Category Archives: Food

Perfect Light Lunch – Middle Eastern Salad

a44

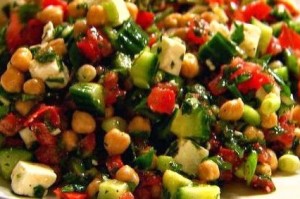
Anytime I’m craving a light lunch, I love to make Middle Eastern Salad. Simply toss together healthy veggies and dressing, marinate overnight, and a delicious meal is waiting for you. Unlike lettuce based salads, this version is remarkably adaptable and unfussy. Since it has no mayo and tastes great at room temperature, it’s ideal for a boxed lunch and also is well received at potlucks.

To make Middle Eastern Salad, you will need:

  •  1/2 cup feta cheese
  • 1 cup tomatoes
  • 1 can chickpeas, drained
  • 2-3 cucumbers
  • Juice of a lemon
  • 6 TBS dressing (Italian or vinaigrettes work best)
  • Salt/Pepper to taste
 

Rinse, dry, and dice the veggies to whatever size you prefer (I like to keep it chunky). Mix everything together in a large bowl, making sure the dressing coats well. Chill for at least 2 hours, but overnight is best (It will keep in the fridge for at least a few days). I don’t deviate from the list above, but if you’d like more options, try onions, peppers, zucchini, and/or sliced black olives.

a444

To serve:

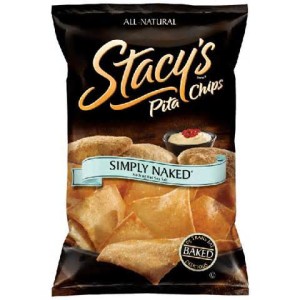
Middle Eastern Salad can be eaten straight from the bowl and is good on its own if you’re counting carbs, diabetic, gluten-free, etc. Because I prefer it with a few sides, I love to scoop it onto pita bread or pita/bagel chips; Stacy’s brand is my favorite.

4 Steps to a Better Packed Lunch

a4

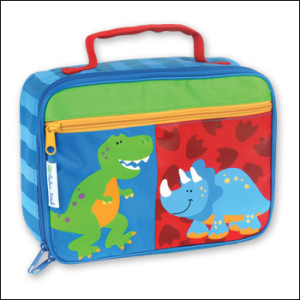
One of the biggest complaints about packed lunches is the lack of variety. Yes, some kids are picky and want a PB & J five days a week, but most will tire of the same meal. By mixing it up, you’ll help to ensure that the lunch is actually eaten rather than tossed.

Here’s how I make a better packed lunch in 4 easy steps:

1. Start with protein

Adding protein helps tummies feel full longer. Any of these are good options:

  • Hard boiled or deviled eggs
  • Cheese cubes
  • Lunch meats (in a sandwich or rolled slices)
  • Greek Yogurt
  • Beans
  • Nuts  (whole pieces or butters)
  • Tofu
  • Chicken strips

2. Pick Produce

Ideally, a packed lunch will contain both fruit and veggies for maximum nutrition. Incorporating produce is important for vitamins and fiber—something most kids lack—but only choose the ones you know they’ll like.

  • Carrot/celery sticks
  • Apples
  • Oranges
  • Bananas
  • Pears
  • Cut-up veggies like broccoli, peppers, etc. (Include dip on the side for best results!)
  • Dried fruit (raisins and apricots are most popular in my family)
  • Salad (not liked universally, but if your kids eat it, by all means, pack it)

3. Energizing Carbs

White bread doesn’t fill them up or add anything but empty calories to their diet. Anything with whole grains is a better choice.

  • Multi-grain crackers
  • 100% whole wheat bread, wraps, or tortillas
  • Rice cakes
  • Quinoa
  • Brown Rice

4. Healthy Fats

Including a healthy fat is not only safe, but preferred. Just make sure to practice moderation.

  • Guacamole or avocado slices
  • Hummus
  • Mayo
  • Olive oil

Pay attention to the size of food as well. Kids love anything mini and I try to make nibblers that don’t require utensils.

  • Tomato & Cheese Stacks (Layer thin slices of tomato and cheese with mayo in between)
  • Apple Stacks (Cut an apple horizontally into 4 pieces. Layer peanut butter between the stacks and reassemble)
  • Cucumber Rolls (Peel a cuke, then slice super thin. Spread with hummus and roll up like sushi)
  • Turkey Stacks (Cubes or slices of meat sandwiched between crackers instead of bread)
  • Waffle Stacker (Toast frozen waffles and cool completely. Add yogurt and sliced berries, stack with another plain waffle on top)

a4

I know some moms will protest that their kids only want drink boxes and Lunchables and will refuse all of the above. If a child is especially resistant to healthy foods, I don’t think it’s wrong to add a treat as an incentive. A Hershey’s kiss, a mini cookie, or a tiny bag of chips helps, and if they won’t eat their broccoli any other way, be realistic and choose your battles. I am for 80% healthy, 20% junky stuff, which is very doable.

Adventures in Canning

a5

While I love to find deals on food, I don’t do much to preserve it beyond freezing. There was one attempt at homemade jam in 2014 and while it came out fine, it’s not something I’d do regularly. And if jamming was overwhelming, canning wasn’t even on my radar, as evidence by these excuses:

  • Nobody will eat it (mushy texture, bad taste, etc.)
  • Lack of equipment (no pressure canner, glass jars/special lids)
  • Lack of knowledge/time
  • Not worth the trouble

But mostly, I think it was a lack of motivation. Luckily, I have a friend who is a back-to-the-land type. Just as she encouraged me to give camping a try, she taught me the basics of canning.

To call her a canning pro is justified. She grew up on a farm in Northern Vermont and has been doing it since her teens (she also makes all her own bread and raises chickens, but that’s another story for another day). A bushel of fruit doesn’t make her blink an eye, unlike yours truly!

We decided to use her kitchen since I was mostly observing. When I arrived, clean, sterile jars were already assembled and the fruit had been washed. It hadn’t, however, been cut, and there seemed to be a small mountain of Bartletts.

Like any job, two can do it more efficiently than one and we slowly worked through them, adding the cut slices to a resting bowl of cold water and lemon juice. As we sliced and talked, a huge storm was raging outside. With the power flickering, we were gambling but the fruit was ready and we pressed on.

I don’t want to bore anyone with canning minutia, but the condensed version includes making a sugar syrup, boiling the pears, filling the jars, and then processing each one until it pops. Oh, and did I mention that my dear friend doesn’t need a recipe, never seems to get tired, and was simultaneously making a pot roast for dinner? Amazing!

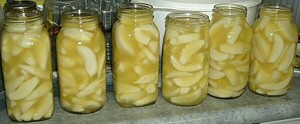
The picture above shows some of our handiwork. As a whole, I found the process fun and educational, but I attribute that to an excellent teacher. Will I be doing this again by myself? It’s doubtful, but I’d help her anytime. I rate my adventure in canning an A+.


Have you ever canned anything? Why or why not?

Bulk Cooking Basics

a4

Bulk cooking can be a lifesaver, or it can seem like a chore and a bore, depending on your viewpoint. Some people call it OAMC (Once a Month Cooking) or Freezer Cooking; regardless of the name, the concept is the same: cook or assemble meals ahead of time.

I became really familiar with the concept after reading America’s Cheapest Family. As an admitted Steve & Annette super fan, I’ve enjoyed trying a lot of their tips. While they take it to an extreme—shopping and cooking only once a month—I’ve found that I prefer to do it on a smaller scale.

When I started experimenting with it, my goal was to save time and money. This is accomplished by shopping the sales and stocking up at rock bottom prices, then planning a menu based on those sale items, and finally cooking items ahead and freezing for future use. I’m also able to take advantage of clearance deals like 8 dozen eggs.

In theory, you’ll use fewer dishes and electricity, too. For example, instead of using the oven daily for one dinner, you can use a single baking sheet and cook tons of meat, shred it, and store it for the future.

Because marathon kitchen days can seem incredibly daunting and every family has different cooking needs and styles, it’s best to customize. Don’t go overboard and attempt 30 meals at once. Start slow and see what actually helps you, rather than creating more of a burden.

Some of the things I regularly make ahead and freeze are beef, poultry, chopped veggies/fruit, muffins, pancakes/waffles, and anything I find marked down that can’t be eaten immediately.

Other things that I’ve frozen successfully include lasagna, breakfast sandwiches, mashed potatoes, pesto/pasta sauce, soups, casseroles and reduced dairy products.

My favorite meat to bulk cook is chicken because it’s so versatile. Sometimes I do whole chickens, but usually it’s breasts. I season it with just salt/pepper, let it cool and then shred. 2-3 cups of the shreds go into each Ziploc. Around Thanksgiving when turkeys are cheap, I’ll cook a couple and shred those, too, but we prefer chicken. This meat will then become BBQ sliders, burrito bowls, tossed with pasta, etc.

Another staple is cooked ground beef. Anytime I find a good sale on some leaner burger meat, I’ll buy 10-lbs or more, depending on available freezer space. Sometimes I simply sauté it, and other times I make meatballs or burger patties.

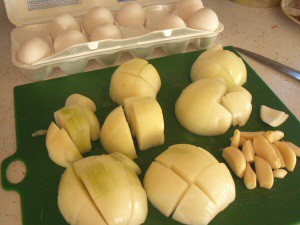
When sautéing meat, I use my largest skillet and fry it in batches with some chopped onions/peppers, garlic, and salt/pepper added. It’s drained of grease, fully cooled, and then frozen in 2-3 cup portions. That meat is so handy to have available for last minute tacos, burritos, chili, stuffed peppers, etc.

For meatballs, I use a large bowl and double or triple the recipe. They can be frozen fully cooked or raw, and both ways turn out fine; it just depends how much energy I have. These are great for pasta dishes, meatball subs, or a quick appetizer.

When freezing, here are some important tips that help:

Wrap foods securely—Nothing is worse than finding out food must be tossed due to freezer burn. I like to use thick freezer bags and/or aluminum foil. I don’t like freezing in saran wrap because it can rip. Many people love using a Food Saver. I have no experience with them, but it’s a good option if you can afford/borrow one.

Label foods well—Be sure to put the date and the exact contents. I learned this the hard way when I had 5 mystery bags and defrosted everything because I’d forgotten. Imagine my surprise when all 5 were cooked chicken!

Rotate—If you’re constantly adding new items, put the oldest on top or in front so they don’t get overlooked or spoil. 

Organize—A freezer needs to be organized if you want to be efficient. I have a side-by-side fridge/freezer combo, so I’m somewhat space challenged. I’d love to invest in a chest freezer in the future, but for now, I use the shelves I have and try to group meats in one place, baked goods in another, etc. For best energy consumption, make sure the freezer is full, but not so tightly packed air can’t circulate (this also helps if the power ever goes out).

Need some inspiration? Check two of my favorite bulk cooking day results:

#1

#2