Category Archives: Food

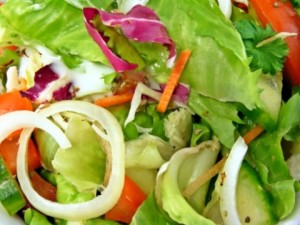
Ultimate Salad List

aaa

It’s day four of a 90-degree heat wave and I’m so annoyed/lethargic/grouchy, it’s unreal! When the weather is this hot and humid, I try to focus on No Cook Summer Suppers, because using the oven is unbearable. Sometimes that means it’s sandwiches, healthy snacks, and prepared food, but lately we’ve been eating a lot of salad, too.

Eating the same 3 ingredients over and over gets boring quickly, so I’m switching it up. Here is my Ultimate Salad List (basically anything you could ever want to put on a green salad):

Salad Vegetables:

lettuce/spinach/spring mix
shredded carrots
chopped onions (I prefer red or Vidalia if eaten raw.)
diced peppers
shredded purple cabbage
diced cucumbers
sliced radishes
sliced olives
diced tomatoes
fresh sprouts
diced avocados
green peas or broccoli

Protein Additions:

sliced steak
sliced chicken or turkey
bite-sized breaded chicken
diced hard-boiled eggs
canned tuna
taco-seasoned ground beef
chick peas
kidney, black beans, or white beans

Toppings:

cheese – cheddar, feta, etc
dried cranberries/blueberries
sunflower seeds
sliced nuts (Walnuts, almonds, pecans—I love ’em all!)
croutons

a3

For the dressing, I’ve been using my stash of $0.38 Ken’s dressing that I bought on sale. If I didn’t have them, I’d make my favorite homemade dressing.

To save time, I recommend washing and chopping the veggies ahead of time. If you’re using meat, it can also be cooked and chopped ahead of time. Package the greens and meat separately and don’t add the dressing until right before eating.


Have I forgotten anything? Share your favorite salad ingredients!

The Art of Cookie Baking

a3

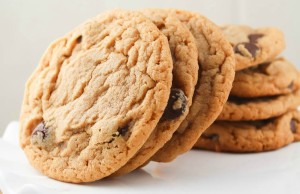
A reader named Beth recently emailed, regarding my Outrageous Cookies:

I followed the recipe but mine came out of the oven rock hard and looked nothing like yours. It seems most things I cook end up in disaster. Does that ever happen to you?

Have I ever had a cooking disaster? OMG, yes! Way more than I’d care to admit/remember. Those of us who enjoy baking usually have many, many failures in the beginning and some happen even to the most experienced bakers as we learn the art of cookie baking.

Cookies, in particular, are challenging (only yeast based breads are harder for me). Cakes, pies, and muffins come easily, but cookies can annoying! You have to mix the dough, cut/form/or drop the cookies onto greased sheets, bake a bit, then it’s switching sheets/shelves in the oven until they’re done, and finally removing cookies to a rack for cooling.

Notice all the babysitting they require? Because it can be a hassle, I want to ensure a perfect result. After a lot of trial and error, here are some of the things I’ve discovered:

Different cookie sheets bake cookies differently. A thin, non-stick (grey or dark in color) sheet will produce darker, crispier cookies than a thicker, stainless steel (lighter colored) cookie sheet. The “air bake” sheets can make a cookie crunchy without getting it too browned.

The size of the cookie also makes a difference, and so do the ingredients chosen. Typically, butter, oil, and sugar will produce crispier cookies than shortening, nut butters, and honey.

Time is crucial. An extra minute or two in the oven can make a huge difference between a soft cookie and a crunchy one. Hot cookies are soft, but as the cookie cools slightly on the sheet, it might finish cooking (depending on the thickness of your cookie sheet) and end up darker than you planned, even before it’s on the rack to cool.

By following the recipe and cooking times exactly, using the best ingredients, and using the proper tools, you’ll be well on your way to 5-star cookies.

Ultimate Cherry Cheesecake

a3

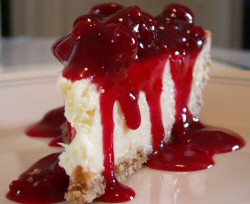
Whenever I need to make a show stopping dessert, I always pull out this recipe for Ultimate Cherry Cheesecake. It is the perfect sweet for a dairy meal or fish meal, and makes a great addition to a holiday, party, or just a special at-home dinner.

I first learned how to make cheesecake from my Grandmum, who was the world’s best cook and hostess. While she preferred to make everything from scratch, I have simplified it by using pre-made crust and fruit topping, but I’ll share both sets of instructions so you can choose.

To make Ultimate Cherry Cheesecake, you will need:

12 ounces cream cheese, softened
1/2 cup sour cream
3/4 cup sugar
2 eggs
1 tsp vanilla
one 9-inch graham cracker crust

Cake instructions: In a large bowl, beat cream cheese, sour cream, sugar, eggs, and vanilla until smooth. Pour into crust and bake for 45 minutes at 350 degrees. Remove from the oven and let cool. Chill for at least 4 hours or up to two days before serving. Top with canned or homemade topping. 

Topping: I normally use a can of cherry pie filling. If you’d prefer to make a homemade version, try this one:

3 cups pitted sour cherries
1 1/2 cups sugar
approximately 1/2 cup water
approximately 1-2 tbs cornstarch, for thickening

Combine fruit and sugar in a pan and stir together. If cherries are soft, you won’t need additional water, but if cherries are firm, add 1/4 to 1/2 cup water. Bring to a boil. Mix cornstarch with some cold water, whisking to remove lumps. Slowly add the cornstarch to the cherries, stirring constantly to prevent lumps. Let cool for at least 30 minutes.

Some folks also like to top cheesecake with whipped cream, but I find it plenty sweet enough on its own. For those who don’t like cherries, strawberries or blueberries can be substituted.

A tip of cutting cheesecake: This used to drive me crazy! I’d have to cut one slice at a time, dip the knife in water, and so on. There is a much better method that’s also unexpected—dental floss. Try this 3-step method and you’ll be hooked.

1. Cut a long piece of dental floss. Too long is better than too
short. Wrap the ends around your fingers/hands to get a nice firm
grip. You should have an amount of floss between your hands that’s
equal to the diameter of your cheesecake, plus a few extra inches.

 
2. Holding the floss taut, cut the cheesecake first in half, then in
fourths, and continue until the desired number of slice is reached.

 
3. Use a knife or serving utensil to remove the cheesecake from the
pan to the serving plate (or to be wrapped and frozen for longer
storage).


Raspberry Streusel Muffins

a3

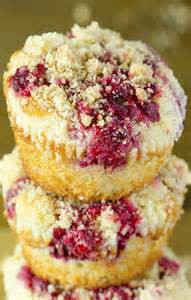
Living in New England, summer time is always about fresh berries. They’re featured in every grocery store, roadside stand, Farmer’s Market and most U-Pick farms. Whenever I spot a deal, I make a point to stock up. Imagine my delight when I found pints of raspberries for only $0.89 each at a local produce store yesterday. I froze 10 pints and used the remainder for these delicious muffins.

To make Raspberry Streusel Muffins, you will need:

2 large eggs
1 cup granulated sugar
1/2 cup vegetable oil
1 tsp almond extract
2 cups flour  (Any will do, but white makes them more cake-like)
1 tsp baking powder
1/2 tsp salt
1/2 tsp baking soda
1 cup sour cream, room temperature
1 cup raspberries

Plus, these for the streusel topping:

1/3 cup brown sugar, packed
1/4 cup flour
2 tbs butter, melted

Streusel Topping: Combine brown sugar, flour and butter with a fork until crumbly; set aside.

Muffins: Beat eggs in large bowl with electric mixer; gradually add sugar. With mixer running pour in vegetable oil and almond extract, blending until smooth. In separate bowl whisk together flour, baking powder, salt, and baking soda. Add flour mixture to egg mixture, alternating with the sour cream; blend until smooth. Set aside.

Spoon one generous tablespoon batter into bottom of muffin tins. Divide half of raspberries equally among muffin cups. Divide remaining batter among muffin cups. Top with remaining equally-divided raspberries. Sprinkle each muffin with streusel topping.

Bake at 375 for 20 to 25 minutes. Let stand for 5 minutes in tins on cooling rack. Remove from tins to rack to cool completely.

These are wonderful for breakfast, snacks, or as a lunch box surprise. Extras freeze beautifully, but we never seem to have any leftovers here when sweets are involved!